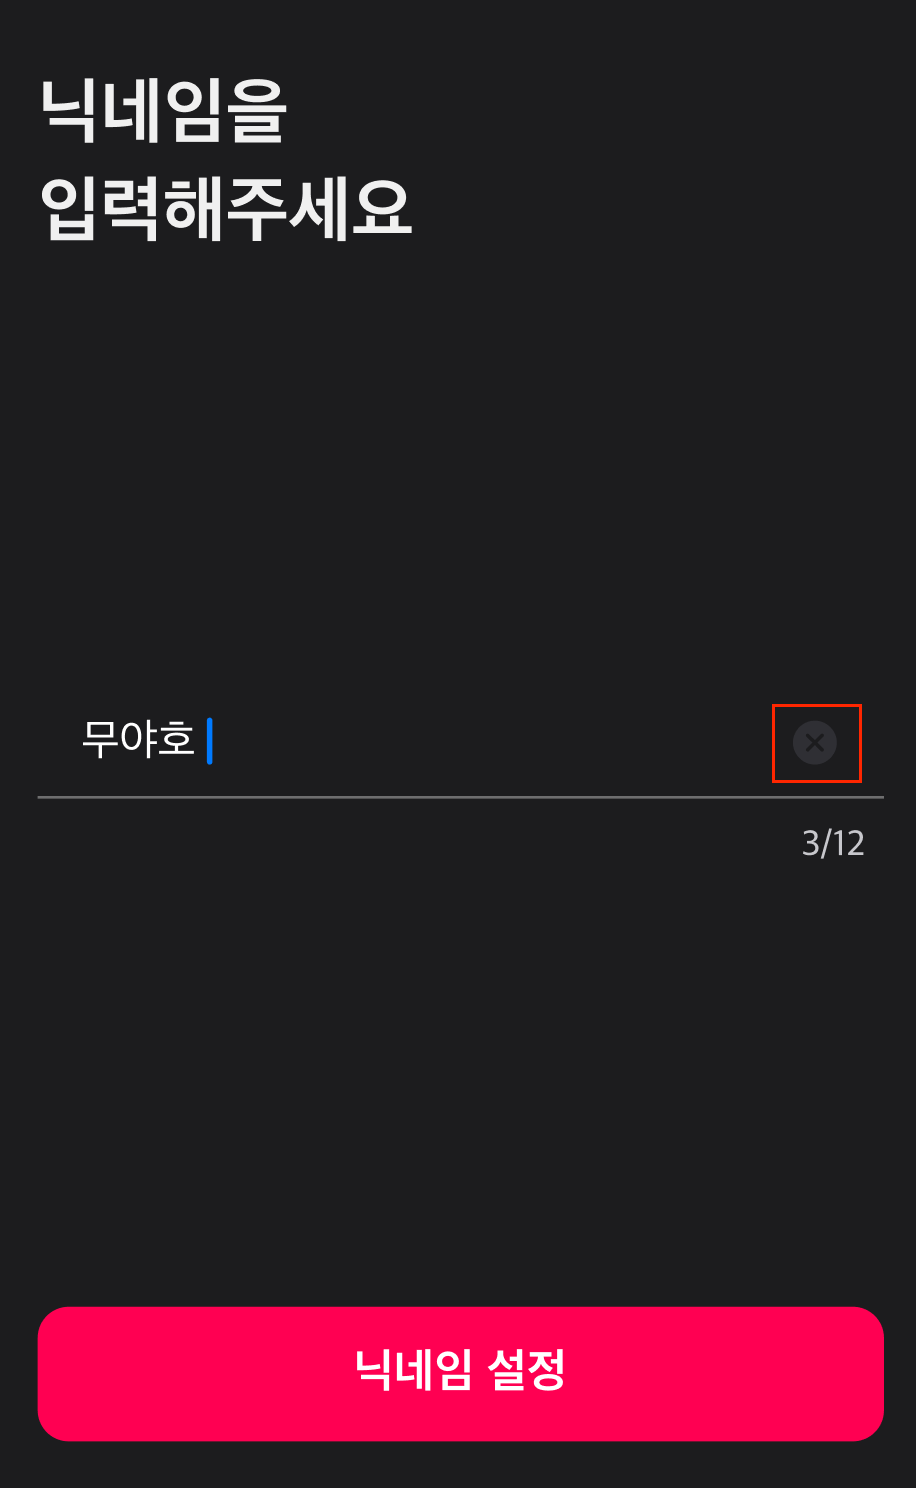
SwiftUI로 사이드 프로젝트 개발을 하다가 아래 사진처럼 TextField에 입력한 텍스트를 한번에 지울 수 있는 Clear Button을 추가하려고 했습니다.
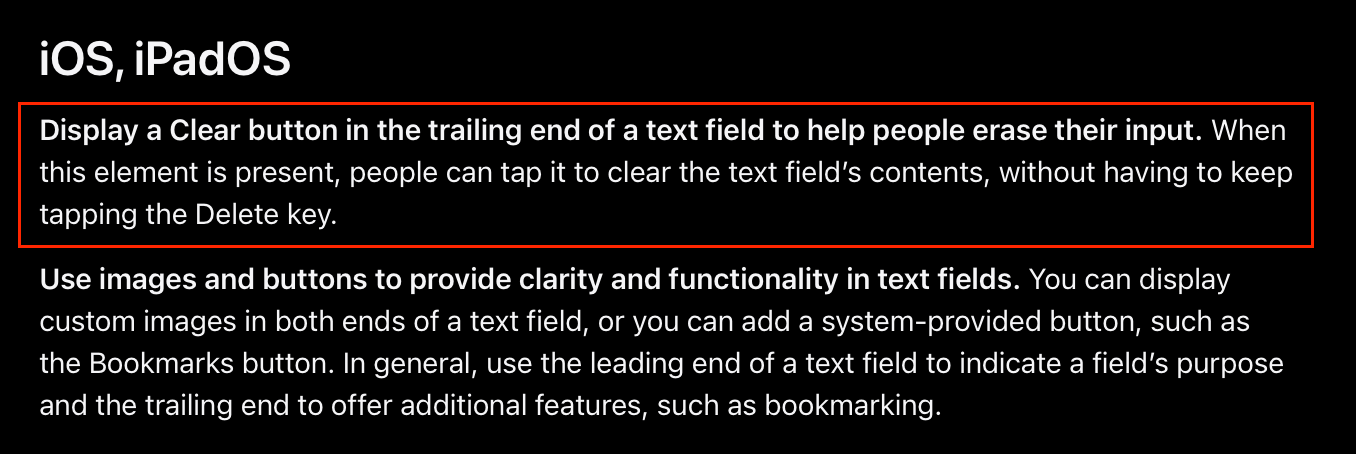
애플의 HIG 문서에서는 Text fields 사용 시,
"사람들이 입력을 지울 수 있도록 텍스트 필드의 마지막 끝에 지우기 버튼을 표시하세요."
라고 하면서 Clear Button의 추가를 권장하고 있습니다.
그렇기 때문에 UIKit의 UITextField에는 clear button 설정과 관련된 옵션이 기본적으로 제공되었고, SwiftUI의 TextField에도 당연히 clear button 관련 옵션이 있을 거라 생각했습니다.
하지만 찾아보니 SwiftUI에서는 기본적으로 제공되는 clear button이 없었습니다.
검색을 해보면 대체로 2가지 방법 중 하나를 사용하는 것으로 보였습니다.
- UITextField를 가져와서 사용
- ViewModifier를 활용한 커스텀 modifier 만들기
각각의 방법을 살펴 보겠습니다.
일단 기본적인 SwiftUI 뷰를 아래와 같이 구성해주었고,
이 뷰를 기반으로 Clear Button을 적용해보겠습니다.
import SwiftUI

struct ClearButtonSampleView: View {

    @State private var myText: String = ""

    var body: some View {
        VStack {
            Text("텍스트를 입력해주세요.")
                .font(.title)
                .bold()

            TextField(
                "텍스트 입력",
                text: $myText
            )
            .textFieldStyle(.roundedBorder)
        }
        .padding()
    }
}
TextField를 그냥 사용한 현재 상태에서는 텍스트를 입력해도 clear button이 적용되지 않습니다.
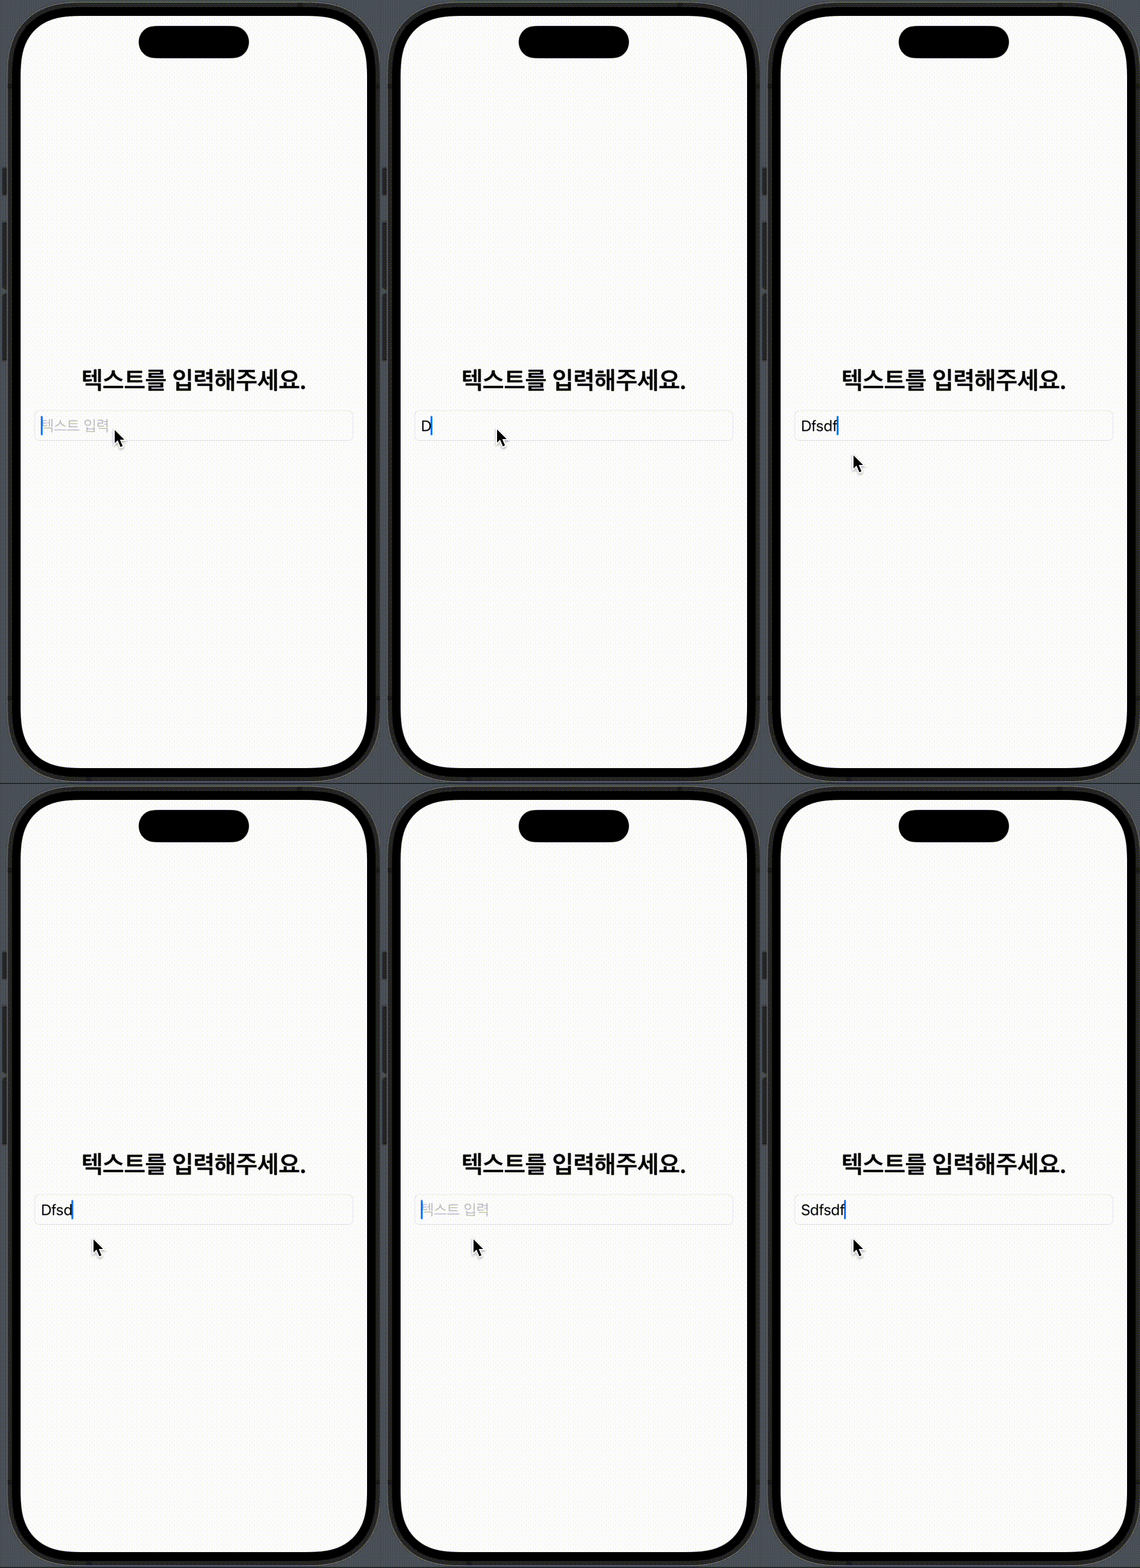
1️⃣ UITextField를 가져와서 사용
UIKit UITextField의 appearance 객체를 통해 clearButtonMode 속성을 지정해주면 SwiftUI의 TextField 사용 시에도 똑같이 clear button이 적용됩니다.
View의 init()이나, .onAppear() 등에 아래의 코드만 추가해주면 clear button이 나타나는 것을 볼 수 있습니다.
UITextField.appearance().clearButtonMode = .whileEditing
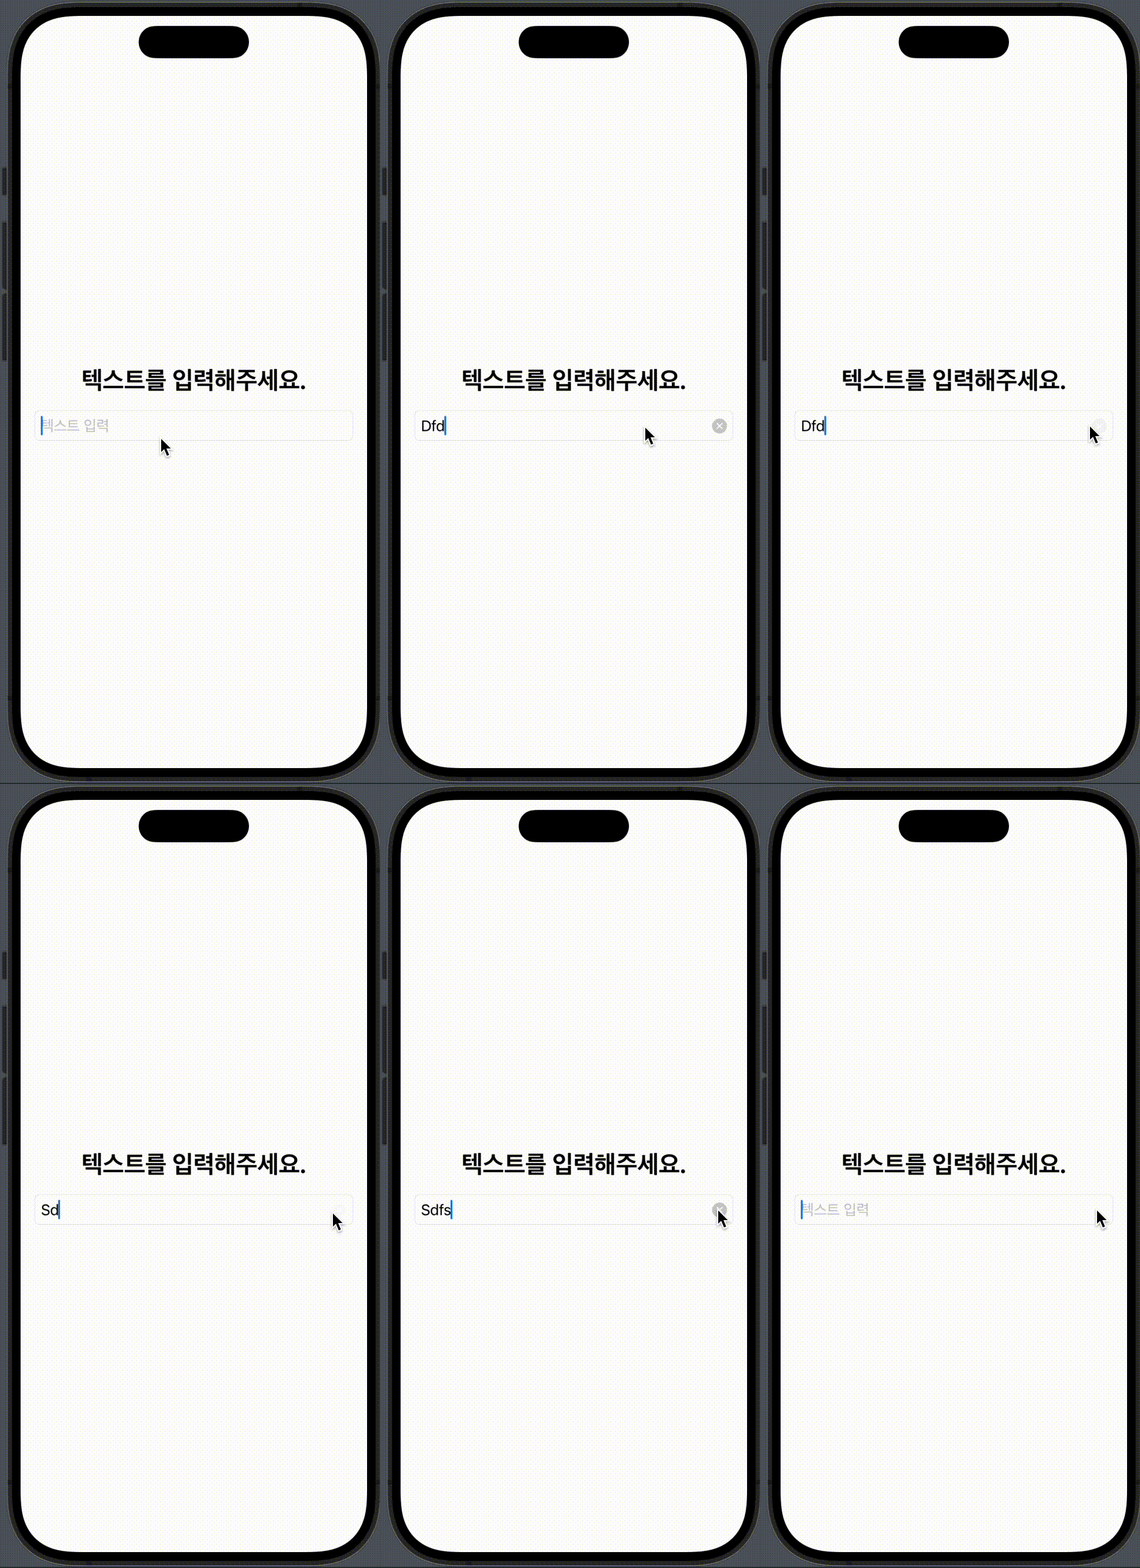
저 같은 경우는 이니셜라이저에 해당 코드를 넣어주었고, 전체 코드는 아래와 같습니다.
⚙️ 전체 코드 - UITextField를 가져와서 사용
import SwiftUI

// MARK: - UITextField 사용
struct ClearButtonSampleView: View {

    @State private var myText: String = ""

    init() {
        // UITextField의 clearButton 속성을 설정
        UITextField.appearance().clearButtonMode = .whileEditing
    }

    var body: some View {
        VStack {
            Text("텍스트를 입력해주세요.")
                .font(.title)
                .bold()

            TextField(
                "텍스트 입력",
                text: $myText
            )
            .textFieldStyle(.roundedBorder)
        }
        .padding()
    }
}
이 방법을 사용하면 굉장히 간단하게 clear button을 적용할 수 있습니다.
이는 TextField가 UITextField를 기반으로 구성되어 있기 때문에 가능한 방법이라고 합니다. TextField의 내부 코드까지는 공개되어 있지 않아서 확인할 수는 없었지만 그렇기 때문에 UITextField의 속성을 건드렸는데, TextField에 적용이 되는 것이라고 볼 수 있을 것 같습니다.
2️⃣ ViewModifier를 활용한 커스텀 modifier 만들기
1️⃣의 방법은 아주 간단하고 쉽지만, clear button의 모양과 기능을 직접 커스텀하는 것은 어렵습니다.
기본적으로 제공되는 모양과 기능을 그대로 써도 상관 없다면 괜찮지만, 그렇지 않은 경우에는 2️⃣의 방법을 사용하게 됩니다.
두번째 방법은 ViewModifier protocol을 활용해 커스텀 modifier를 만들어준 뒤, 이를 TextField에 적용시켜주는 방법입니다.
이 방법을 채택할 경우에는 clear button를 통해 더 상세한 동작 제어가 가능해집니다.
ex) clear button을 통해 없앤 텍스트를 다시 복구(undo), 버튼의 외형 커스텀
- 먼저 ViewModifier 프로토콜을 채택하는 ClearButton 구조체를 생성해줍니다. ViewModifier 프로토콜을 채택하고 해당 프로토콜에서 요구하는 body(content:) 메서드를 구현해주면, 커스텀 modifier가 적용될 content에 접근할 수 있게 됩니다.
- 그 후 some View 타입을 반환하면서 modifier가 적용된 뷰를 사용할 수 있게 됩니다.
- TextField에서 입력한 텍스트를 받기 위한 바인딩 프로퍼티도 정의해줍니다.
struct ClearButton: ViewModifier {

    @Binding var text: String

    func body(content: Content) -> some View {

    }
}
이제 body(content:) 메서드 내부에 아래와 같이 내용을 작성해줍니다.
- ZStack으로 content(modifier가 적용될 컴포넌트 - TextField)를 감싸줍니다.
- trailing alignment를 적용해줍니다. (clear button을 뒤로 배치하기 위해)
- 입력된 text가 비어 있지 않을 때만 clear button이 표시되도록 해줍니다.
- SF Symbol의 multiply.circle.fill을 사용해서 clear button을 만들어줍니다.
- 버튼 클릭 시에는 입력한 text를 빈 문자열로 만들어줍니다.
// 2. trailing alignment 적용
ZStack(alignment: .trailing) {
    // 1. ZStack으로 content를 감싸줌
    content

    // 3. 입력된 text가 비어 있지 않을 때만 clear button 표시
    if !text.isEmpty {
        // 4. 커스텀 clear button 구성
        Button {
            // 5. clear button 클릭 시 동작
            text = ""
        } label: {
            Image(systemName: "multiply.circle.fill")
                .foregroundStyle(.gray)
        }
        .padding(.trailing, 8)
    }
}
이제 clear button의 구성은 완료했고, 뷰에서 modifier를 적용할 수 있도록 메서드를 정의해줍니다.
View의 익스텐션으로 바인딩 text 프로퍼티를 전달해서 커스텀 modifier를 호출하는 메서드를 정의해줍니다.
extension View {
    func clearButton(text: Binding<String>) -> some View {
        modifier(ClearButton(text: text))
    }
}물론 TextField에서 직접 .modifier(ClearButton(text: $myText))를 호출해줘도 되지만 이런 식으로 사용하는게 국룰이라고 합니다. 사용할 modifier의 목적도 더 명확하게 명시하면서 호출 시 코드도 간결해지겠죠?
이제 아래와 같이 코드를 작성해주면 텍스트필드에 clear button modifier가 적용됩니다.
.clearButton(text: $myText)를 통해 입력한 텍스트 프로퍼티를 ClearButton modifier로 전달하여 입력한 텍스트에 따라 clear button을 화면에 보여주거나 숨기도록 해줄 수 있습니다.
TextField(
    "텍스트 입력",
    text: $myText
)
.textFieldStyle(.roundedBorder)
.clearButton(text: $myText)
전체 코드는 아래와 같습니다.
⚙️ 전체 코드 - ViewModifier를 활용한 커스텀 modifier 사용
import SwiftUI

// MARK: - 커스텀 Modifier 사용
struct ClearButtonSampleView: View {
    @State private var myText: String = ""

    var body: some View {
        VStack {
            Text("텍스트를 입력해주세요.")
                .font(.title)
                .bold()

            TextField(
                "텍스트 입력",
                text: $myText
            )
            .textFieldStyle(.roundedBorder)
            .clearButton(text: $myText)
        }
        .padding()
    }
}

struct ClearButton: ViewModifier {

    @Binding var text: String

    func body(content: Content) -> some View {
        // 2. trailing alignment 적용
        ZStack(alignment: .trailing) {
            // 1. ZStack으로 content를 감싸줌
            content

            // 3. 입력된 text가 비어 있지 않을 때만 clear button 표시
            if !text.isEmpty {
                // 4. 커스텀 clear button 구성
                Button {
                    // 5. clear button 클릭 시 동작
                    text = ""
                } label: {
                    Image(systemName: "multiply.circle.fill")
                        .foregroundStyle(.gray)
                }
                .padding(.trailing, 8)
            }
        }
    }
}

extension View {
    func clearButton(text: Binding<String>) -> some View {
        modifier(ClearButton(text: text))
    }
}
📌 clear button 커스텀
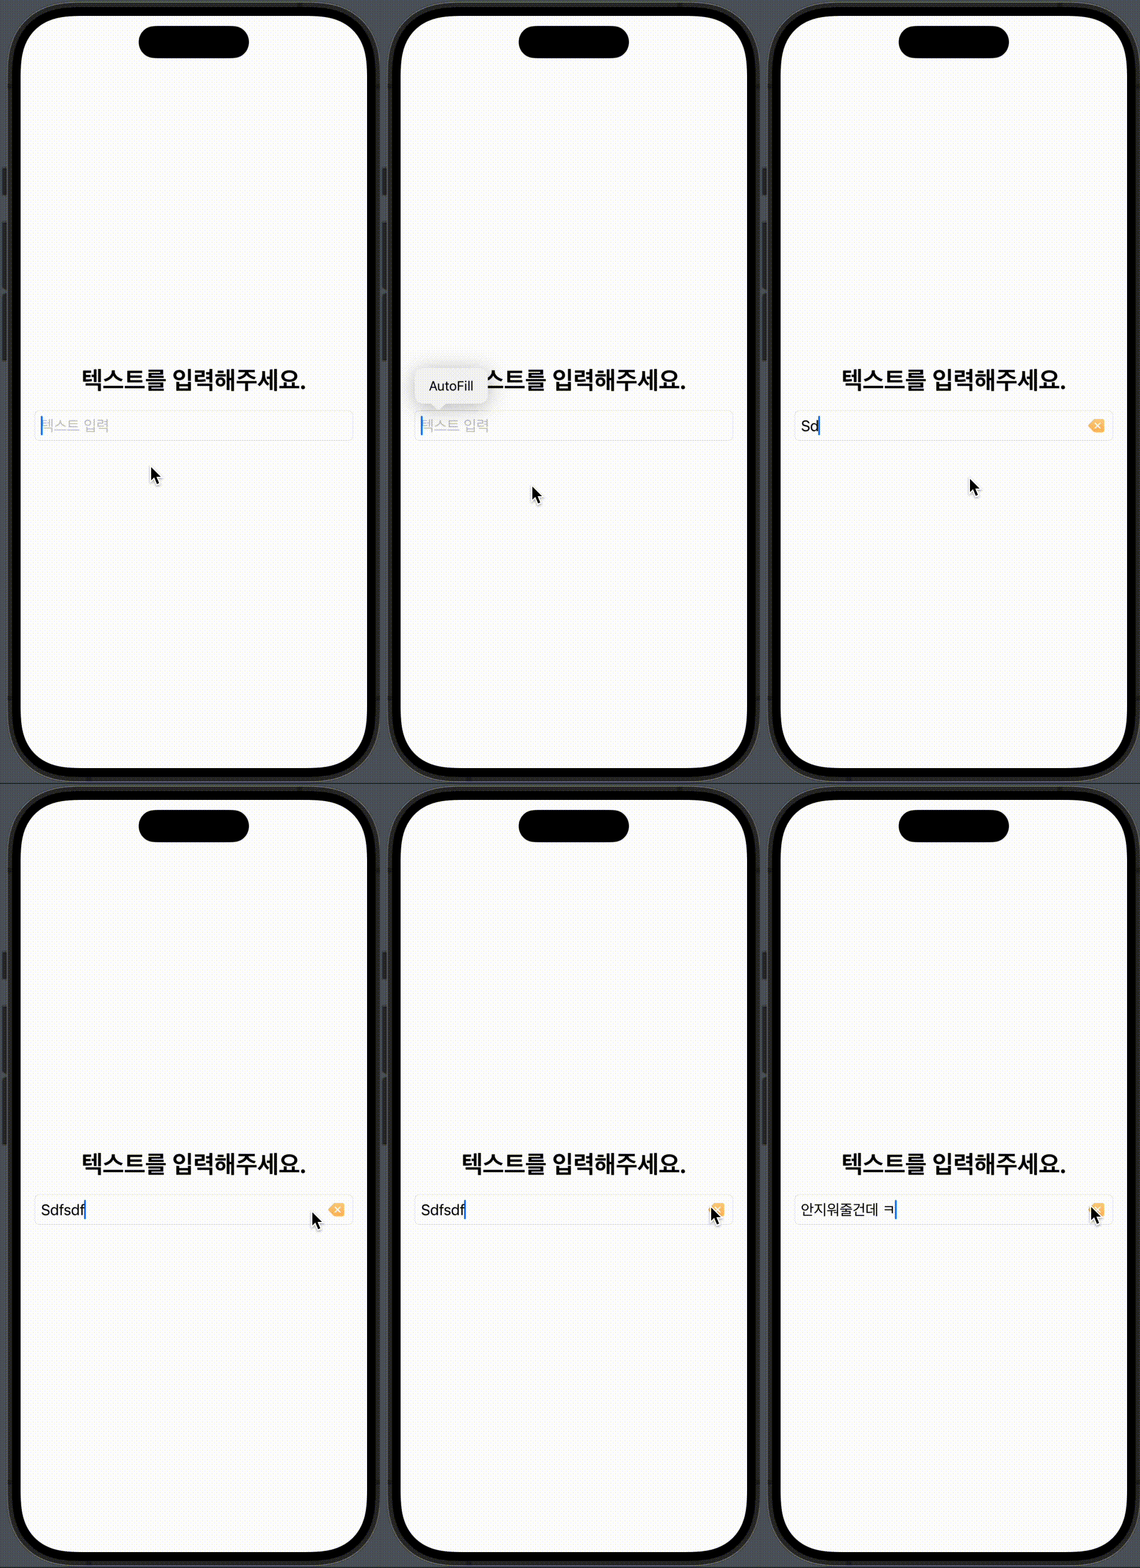
이제 ClearButton modifier를 수정함으로써 clear button의 외형이나 동작을 커스텀할 수 있습니다.
한번 아래과 같이 수정해보았습니다.
- 버튼 모양을 변경
- clear button 클릭 시 텍스트를 지우지 않고, 약올리는 문구 출력
if !text.isEmpty {
    Button {
        text = "안지워줄건데 ㅋ"
    } label: {
        Image(systemName: "delete.backward.fill").foregroundStyle(.orange.gradient.opacity(0.6))
    }
    .padding(.trailing, 8)
}
레퍼런스
https://www.devtechie.com/community/public/posts/231542-how-to-add-clear-button-in-textfield
How to add clear button in TextField
SwiftUI TextField provides many functionalities out of the box but if you are looking for clear button similar to what UIKit version of TextField provides, you will not find it as its not available. At least without adding extra bit of code. In this articl
www.devtechie.com
https://developer.apple.com/documentation/swiftui/viewmodifier
ViewModifier | Apple Developer Documentation
A modifier that you apply to a view or another view modifier, producing a different version of the original value.
developer.apple.com
'iOS' 카테고리의 다른 글
| [ iOS ] String에서 숫자 찾기 & 패턴 찾기 (2) | 2024.05.30 |
|---|---|
| [ iOS ] Comparable 프로토콜을 사용하여 열거형 값을 비교하기 (0) | 2024.05.30 |
| [iOS] Build input file cannot be found: '~/Info.plist' 에러 발생 시 (0) | 2024.05.05 |
| [iOS] Core Location 테스트하기 (외부 의존성의 응답을 테스트하기) (0) | 2024.05.03 |
| [iOS] Core Location 사용해보기 (0) | 2024.04.23 |
